

Positive Pay User Guide
Fidelity Bank’s Positive Pay service compares the data of checks presented for processing on a bank account against basic check information that has been previously provided to the bank. By comparing these two sets of information, the system determines any discrepancies or exception conditions. It is important to prepare a file after checks are issued. Once prepared, it is uploaded directly into the Fidelity Bank Positive Pay system. The frequency with which this file is sent is dependent on the frequency with which checks are written. Files can be prepared using a few different layouts: Fixed Field, Comma Delimited (*.csv), or Tab Delimited (*.txt). Using these different layouts will require a custom mapping to be created within Business Advantage. A manual file can also be submitted through Business Advantage. The following instructions will show how to upload using a standard file format, custom template, and manual template. Contact Business Solutions Support for assistance with mapping your file in Business Advantage or for more information regarding this fraud protection service. Please call 1-855-547-1385 and select option 3, or email businesssolutions@fidelitybanknc.com.
Importing Using Templates
Log in to Business Advantage and select Cash Management on the main navigation menu.

Click the Positive Pay button, Import Templates, and then Submit.

In the Template List box, select Add Template.
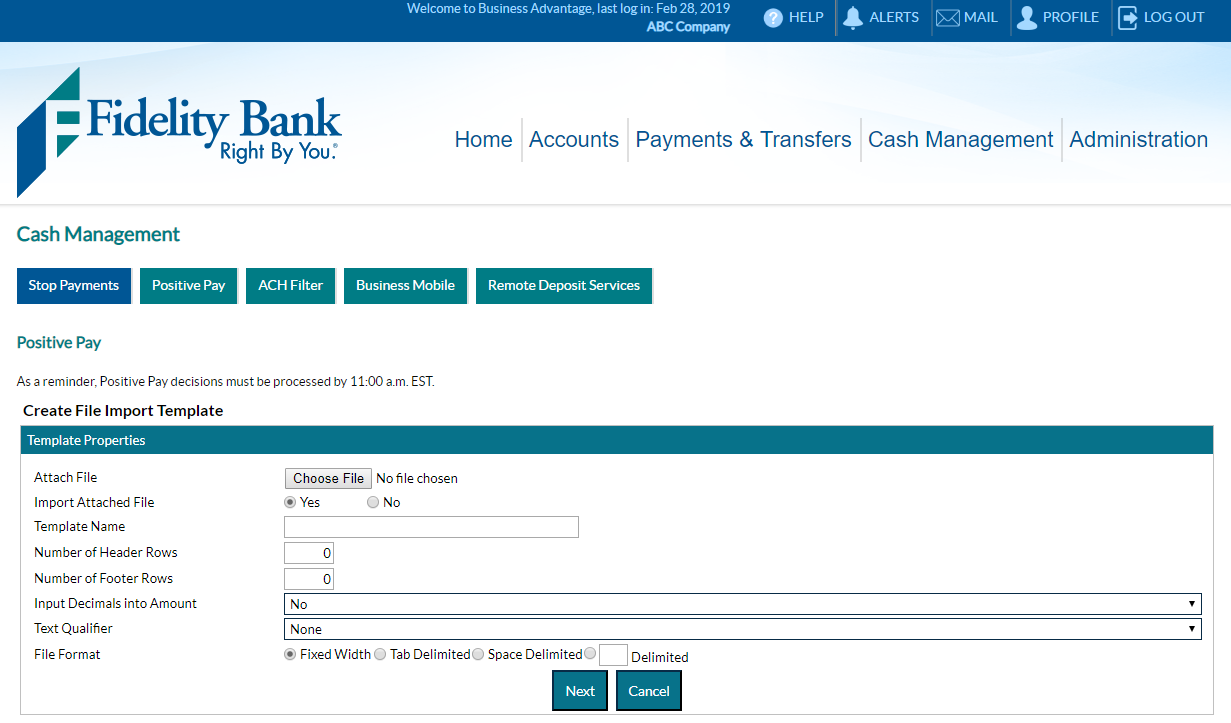
Click on Choose File. Locate the file on your computer you would like to upload and click Open.
Select Yes to import the attached file. (You are not required to import the file when creating the template.)
Enter a name for the template in the Template Name field.
Complete the fields that notate the number of header and footer rows. (You must have at least one header row.)
Make a selection for Input Decimals into Amount and Text Qualifier fields.
Select File Format. If delimited, type the delimiter used in the space provided (e.g. ‘,’ or ‘|’).
Click Next and additional options will appear based on file format selection.
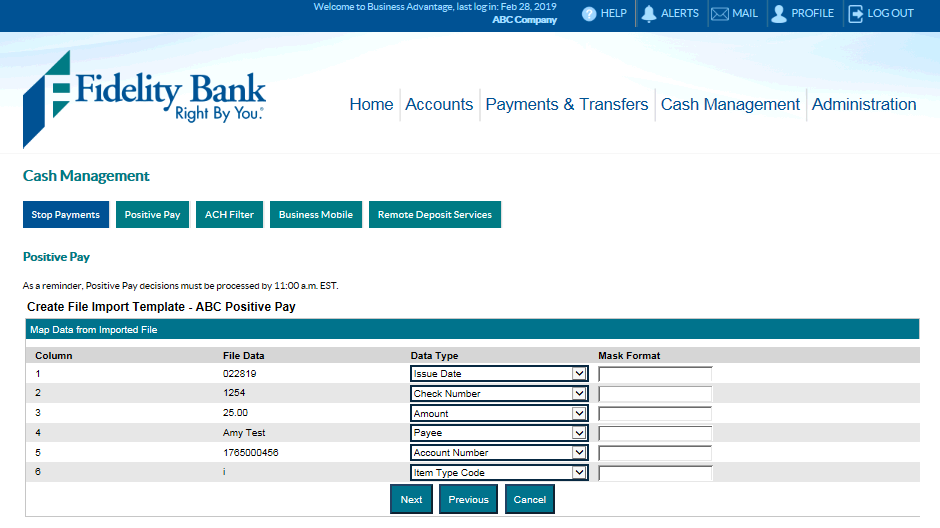
Map your template to be used again as needed. Utilize the drop-down menus to indicate the data type for each field.
Click Next.
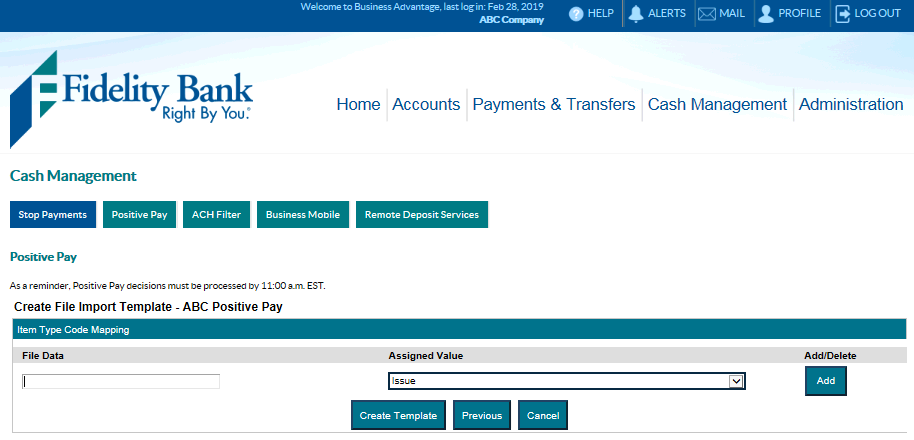
Complete the Item Type Code Mapping.
Click Create Template.
Note: When you set up a file to import into Business Advantage, the following must be formatted correctly:
- Date fields as MM/DD/YY
- Check number as numeric only
- Account number as numeric only
- Payee
- Amount as numeric only
- Processing Codes (I: Issue, V: Void, R: Reissue)
Importing A Standard File Format

Log in to Business Advantage and select Cash Management on the main navigation menu.
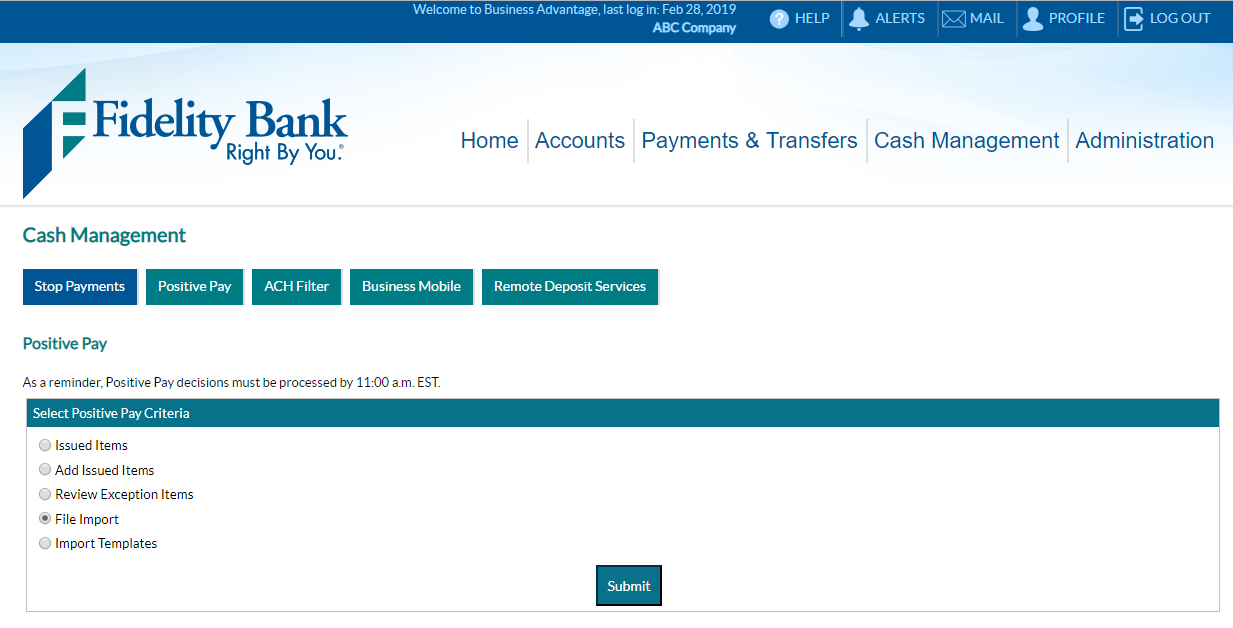
Click the Positive Pay button, File Import, and then Submit.
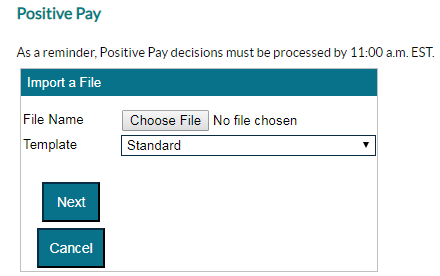
In the Import File box, select Choose File. Locate the file on your computer you would like to upload and click Open.
Always select Standard for the template.
Click Next.
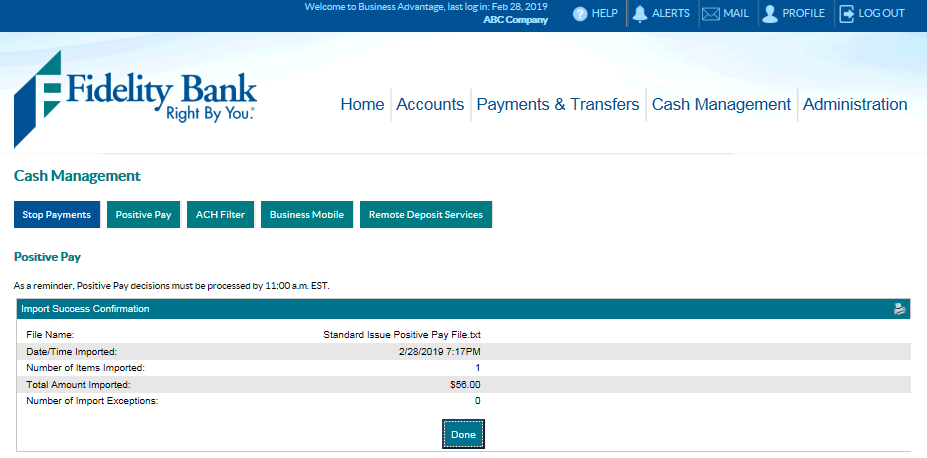
Acknowledge the import was a success by selecting Done.
Manual Entry

Log in to Business Advantage and select Cash Management on the main navigation menu.

Click the Positive Pay button, Add Issued Items, and then Submit.
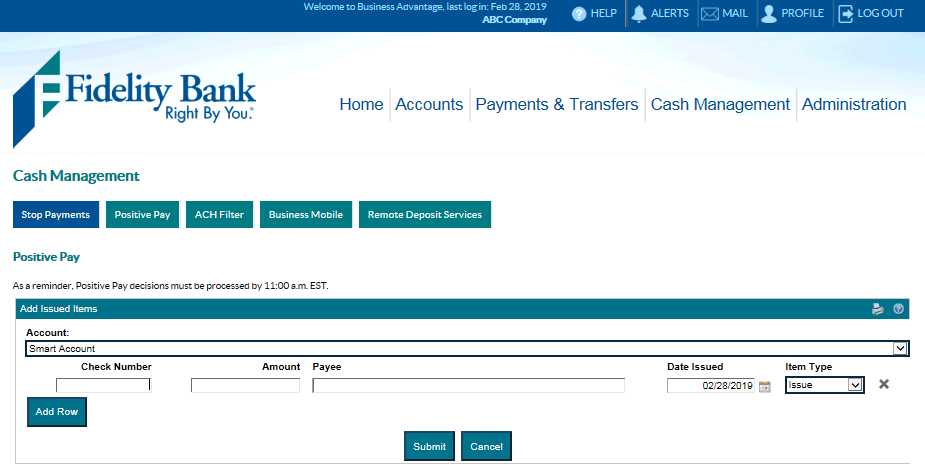
Choose the correct account from the drop-down box and complete the fields for all checks that need to be included in an issue file. To add additional checks, click the Add Row button.
Click Submit.
Reviewing Positive Pay Exceptions

Log in to Business Advantage and select Cash Management on the main navigation menu.

Click the Positive Pay button, Review Exception Items, and then Submit.
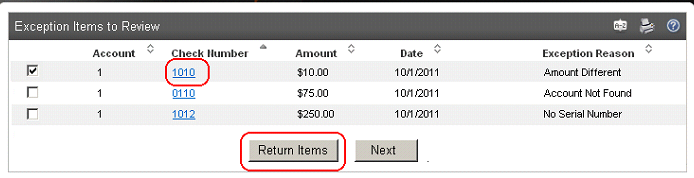
The positive pay exceptions review option provides an interactive view of any positive pay exception items identified each business day. Exceptions will reflect the account, check number, date posted, amount, exception reason.
Review the list of exceptions. View check images by clicking on the link(s) in the Check Number column.
To return an item, place a check in the box next to each item.
Click Return Items to process. Decisions on checks must be made by 11:00 AM ET.
View Our Other Resources
Get access to other helpful guides, demos, and additional resources
to make banking with Fidelity Bank even easier.